
Do you have several video or music files on your Mac that you desire to store or share with your family or friends? Burning them to DVD is a great option! It frees up space on your Mac while allowing easy sharing.
Several programs can burn media files to DVD, which we will discuss in this post, so you can master how to burn a DVD on a Mac. We will also cover what you need to prepare and helpful tips for burning and troubleshooting. Check the parts below to learn all of these!
Part 1. What to Prepare
Burning a DVD on your Mac can be easy if you have the right things ready. Below is a list of what you need to prepare:
• Internal or External DVD Burner
Most Macs no longer come with a built-in DVD drive. If your Mac has one, you can use it. If not, you will need an external DVD burner. You can connect these small devices to your Mac using a USB cable.
• Blank DVD Disc
Get a blank DVD. There are two main types:
1. DVD-R: This works well for storing files or videos you do not plan to erase later.
2. DVD-RW: You can erase and reuse this type of DVD if you need to make changes.
• DVD Burning Software
DVD-burning software is essential. Luckily, there are free DVD-burning software you can rely on. These programs help your Mac prepare files and copy them to the disc.
Part 2. How to Burn a DVD on a Mac
1. Tipard DVD Creator
Tipard DVD Creator is a powerful program that can help burn DVDs on Macbook Air, Pro, and other Macs. With it, you can easily customize your DVD with different menu styles. These include animal or scenery backgrounds and text and images.
This DVD-burning software also lets you edit videos by trimming, cropping, and adjusting brightness and contrast. You can add audio and subtitles and adjust video and sound sync. On top of that, it allows you to burn DVDs with no watermark and provides multiple customization options.
To learn how to burn a DVD on a Mac, rely on the steps presented:
Step 1First and foremost, download Tipard DVD Creator from the official website. Follow the instructions to install it on your Mac.
Step 2Launch the program and hit the Add Files button. Find and select the media file you want to burn.

Step 3Click the Edit button to adjust brightness, contrast, and volume settings, and trim the video if needed. You can also add a watermark. Make sure to hit the OK button to save changes.

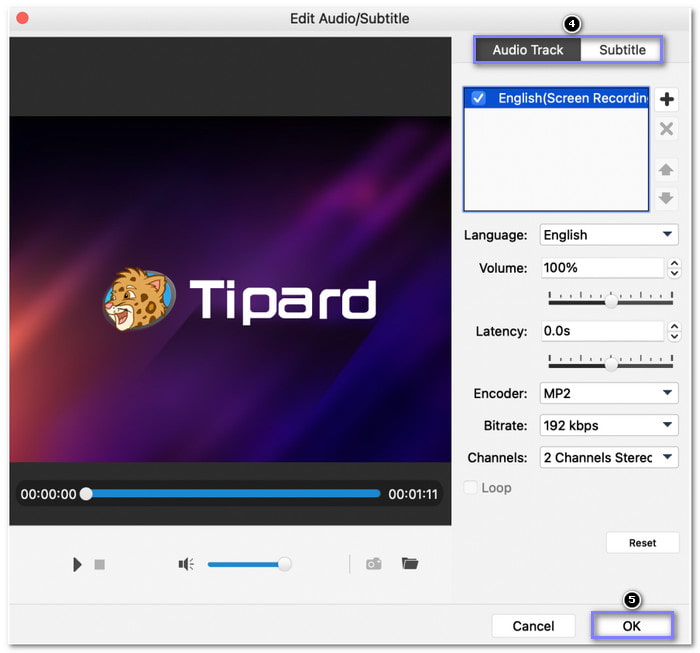
Step 4If you want, add audio tracks and subtitles. You can also adjust video settings like bitrate and channels. Remember to press the OK button to confirm.
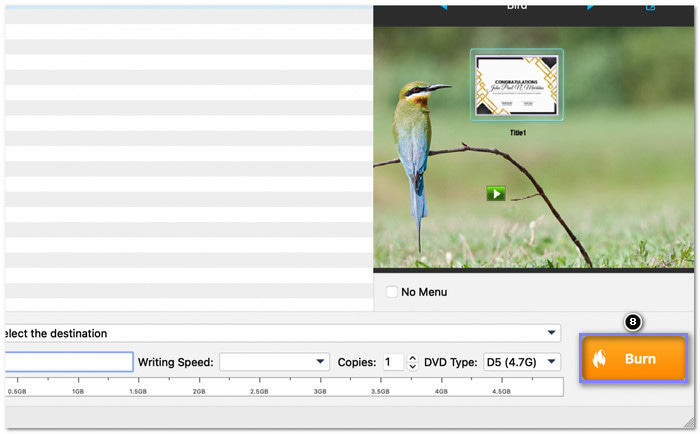
Step 5Now, customize the DVD menu by choosing a theme from Animal, Scenery, or Festival options. You can also add background music, pictures, or an opening film. Do not forget to click the Save button to confirm your settings.

Step 6Place a blank DVD into your Mac's DVD drive. When ready, click the Burn and Start buttons to begin the burning process. It will take a few minutes to complete.
2. Finder
Finder is a built-in app on a Mac that helps you manage files, apps, and disks. It is also a MacOS burn DVD software that is free to use and does not need extra software to work. However, it only burns data DVDs and lacks advanced features like menu templates or editing options.
Step 1Click your Mac desktop or open a window.
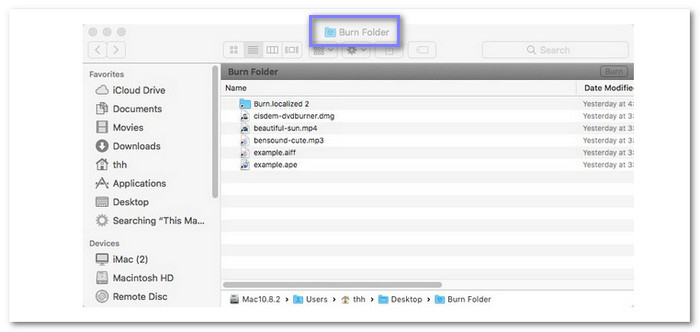
Step 2Go to File and then New Burn Folder to create a folder with the files you want to burn. You can add MP4, MKV, MOV, or JPG file types. After that, drag your files into the new burn folder.
Step 3Now, insert a blank DVD into your Mac's drive. Open the Burn Folder and click the Burn button. The process will start automatically, and your files will burn to the DVD.
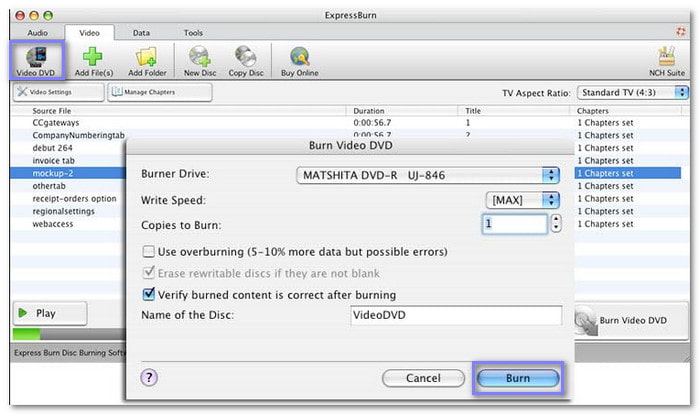
3. Express Burn
Express Burn is an easy-to-use program that burns a DVD on a Mac. However, note that the free version only allows you to burn music to CDs. To burn DVDs, you need the paid version. It also lets you create or manage chapters for DVD menus. The downside is that it cannot bypass copy protections when copying DVDs or Blu-rays.
Step 1Insert a blank DVD into your device, then open the program.
Step 2Choose the type of disc you want to burn. Select Video DVD and click Create.
Step 3Add your video files by clicking Add File(s) or Add Folder. You can also apply drag and drop method to import the files into the program.
Step 4Click the Burn video DVD to set up the burning process. Adjust settings like write speed, burner drive, or the number of copies if needed.
Step 5Once ready, click Burn to start burning your DVD. When the process finishes, a popup will confirm it was successful.
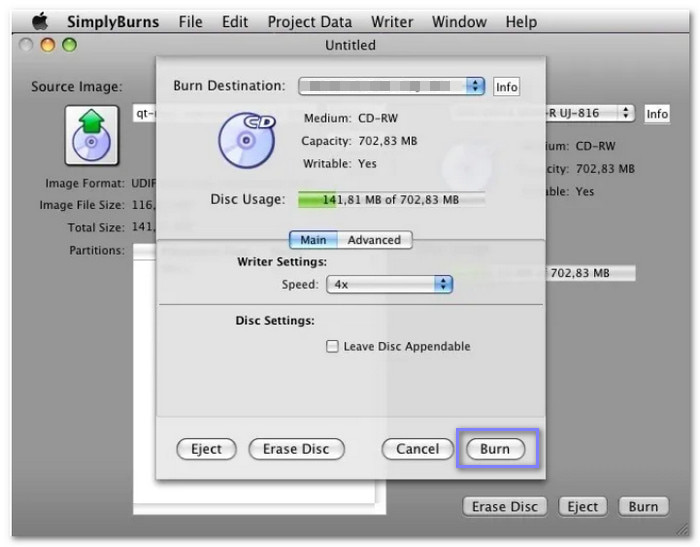
4. SimplyBurns
SimplyBurns is an open-source program for Mac that lets you burn media files like music and photos or burn data to DVDs or CDs. SimplyBurns offers different modes, like audio and data project, backup, burning images, and disc ripping. However, it has not been updated for years, so it may have compatibility issues with newer Mac systems and devices.
Step 1Place a blank DVD into your Mac's optical drive and run SimplyBurns.
Step 2Click the DVD button to choose the DVD-burning option. Then, import the video files you want to burn.
Step 3Arrange the files in the order you want by dragging and dropping them.
Step 4Hit the Burn button, and SimplyBurns will automatically eject the DVD once finished.
Part 3. Tips for a Successful DVD Burning
Burning a DVD can be easy, but it is important to do it correctly. Small mistakes can lead to errors or a DVD that does not work. To make sure your DVD turns out great, consider these simple tips.
• Use High-Quality Discs
Always choose good-quality blank DVDs. Cheap discs may not work well and can fail during burning.
• Check Your Burner
Make sure your internal or external DVD burner is working properly. Test it if you are unsure.
• Choose the Right Speed
Burn your DVD at a slower speed for better results. High speeds can cause errors or skipped sections.
• Verify Your Files
Double-check that all files are ready and in the right format. It avoids problems during burning.
• Use Reliable Software
Pick software that fits your needs. Look for options that handle the type of DVD you want to create.
• Test Your DVD
After burning, test the DVD on a player or another computer. Make sure it works as expected.
• Avoid Interruptions
Do not run heavy programs while burning. It ensures the process goes smoothly without errors.
Part 4. Troubleshoot Common DVD Not Burning Issues
Sometimes, you burn a DVD to save your favorite videos or important files. Everything seems fine, but then an error pops up, or the process stops halfway. The disc may not work after burning, or your Mac does not recognize the DVD burner. These situations can be frustrating, but they are often easy to fix. Knowing what to do can help you solve the problem and finish your DVD without stress.
• Disc Quality Is Poor
Use high-quality blank DVDs. Low-quality discs may burn incorrectly or have playback issues.
• The Burner Is Not Recognized
Check if your Mac computer can detect the DVD burner. If it is external, make sure the USB cable is connected properly. Restart your Mac or try a different USB port.
• Blank Disc Not Detected
Make sure the blank DVD is clean and scratch-free. Try using a new disc if the problem continues. Also, check that the disc is compatible with your burner.
• Burning Is Too Slow
Close unnecessary programs running on your Mac. Choose a moderate burning speed to avoid errors.
• Error Messages Appear
Read the error message carefully. It may point to problems like incompatible files or a faulty disc. Follow any suggestions provided by your software.
• Software Freezes
Update your DVD-burning software to the latest version. Restart your Mac and try again.
Conclusion
It is very simple to burn MP4 to DVD on a Mac with the help of the right tools. Here, we have provided some software with useful features for your convenience. When selecting the best one, some factors that should be considered include OS compatibility, simplicity, functionality, speed, security, and cost. Luckily, Tipard DVD Creator meets all these qualifications and provides professional outcomes! So, try it now!
More Reading
-
 5 Top Notch Software to Burn MKV to DVD on Mac and Windows
by Lily Stark on 2024-08-01
-
 How to Convert MOV to DVD Easily on Windows 11/10/8 and Mac
by Lily Stark on 2025-03-14
-
 How to Burn DVD with VLC Media Player [with Pros and Cons]
by Lily Stark on 2025-03-14
-
 How to Burn MP4 to DVD on Mac and Windows - 10 Softwarfe
by Lily Stark on 2016-11-08