3 Ways about How to Delete Videos from iPad

Before my recent traveling, I transferred several videos from iTunes to my iPad. But now, I don't need it anymore. I tried tapping and holding on the video - nothing happened, and I tried swiping - nothing happened. I am at my wits end trying to create space. Any advice on how to get these off?
iPad is so convenient a device to handle, that iPad users always download too much on it, especially memorable videos and the latest movies. Limited storage frustrated users so much, to free up the iPad storage space, it is necessary to regularly remove videos from iPad. Due to the easy operation to sync videos and info onto iTunes library or computer, you don't need to worry about permanent losses in delete action.
Part 1: Directly Delete Videos on iPad
There are many tutorials guide to delete videos directly on iPad. Among those tutorials, let me introduce you one common metho.
-
Recorded Videos
- Tap the Photos App
- Choose videos and then tap Select tab in the upper right
- Tap all videos you want to delete
- Tap the Trash Can icon in the upper left
- Confirm by tapping Delete Videos
-
Movies and TV shows
- Tap the Videos App
- Choose the Movies or TV Shows tab in the upper middle
- Tap Edit tab in the upper right
- Directly tap the Delete Button, X in the circle
When delete videos directly on iPad, you should pay attention to back up videos in advance. To simplify the backup and delete processes, you could consider Tipard iPhone Transfer Ultimate. Owes to its one-click feature, it doesn't bother you with a series of troublesome operation.

- Delete videos from iPad easily and fast
- Highly compatible with iOS 18
- Copy music/video/photos and other files to iPhone/iPad/iPod in one click
- Support all popular iOS devices, including iPhone 6s, etc
Part 2: Delete Videos with iPhone Transfer
Download and Install
Download Tipard iPhone Transfer Ultimate, and then double-click the .exe file to install it on your computer. Run Tipard iPhone Transfer Ultimate after connecting your iPad to computer, and you will find all items shown in the library of the left sidebar.
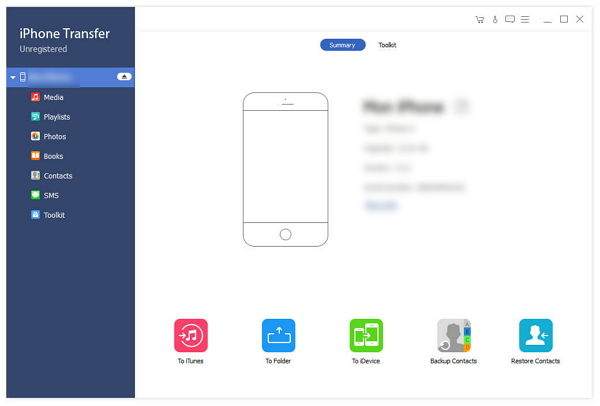
Choose Videos
Click on the Media tab in the left sidebar to find videos you want to delete. On the top of the right window, you can find a series of tabs. Click on Music Videos tab, if you want all music videos to be shown in the right window and transferred to computer.
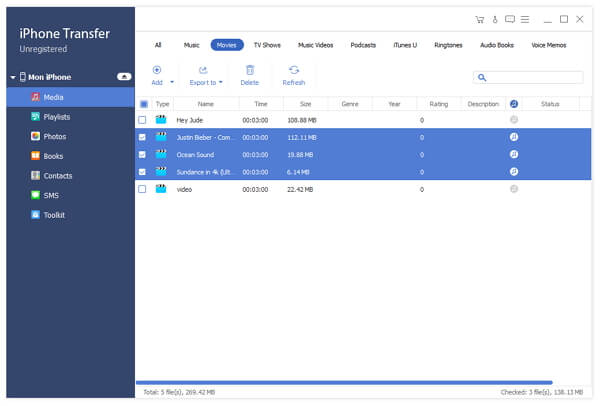
Transfer to Computer
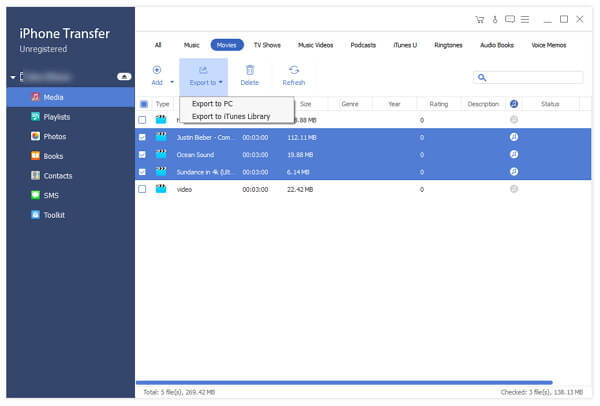
Check the boxes before the Type tab on the top bar. Click on Export To and a pop-up dialog will be shown, or right-click the chosen items to show a drop-down list and click on Export To > Export To PC. Choose a folder on your computer to save the items you want to keep, and then transfer begins with a superfast speed after clicking OK. Another pop-up dialog will be showed while transferring is finished.
Delete Videos
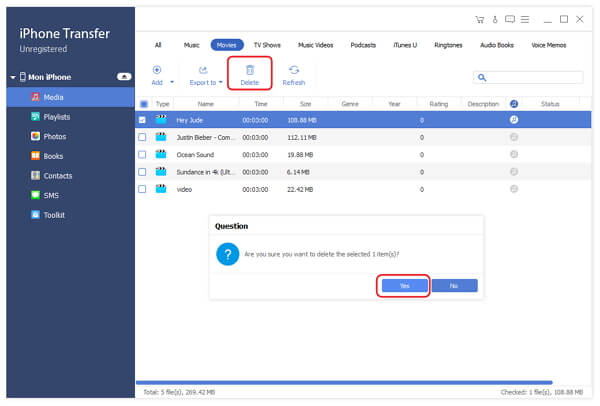
Check the boxes before the targeted items, and then click on the Trash Can icon in the upper icon bar. A pop-up dialog will be showed, and finally confirm by clicking OK.
Though iPad take advantage of its own feature to delete videos without much effort, even you can delete videos with tools to simplify the process, but you may not realize that you can't delete these messages for good, which means what you have deleted are recoverable. Thus one software is created for the permanent deleting – Tipard SafeEraser.
Part 3: Delete Videos with iPhone Eraser
Download and Install
Download Tipard iPhone Eraser and then double-click the .exe file to install it on your computer. Run iPhone Eraser after connect your iPad to computer, and the software will detect your device automatically.

Choose the degree as you wish
Click blue low under the Erasing Level, you will see choices about degree to delete data in the pop-up interface.
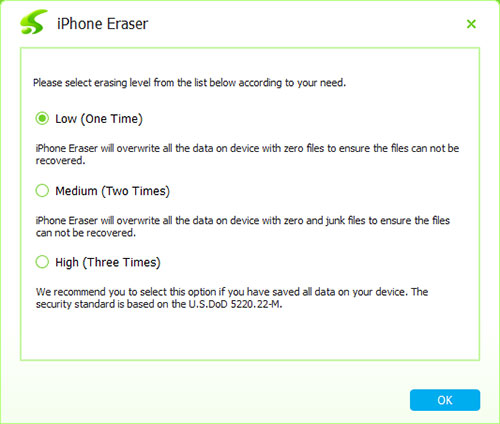
Delete Videos
Click Start to delete data in the degree you chose.
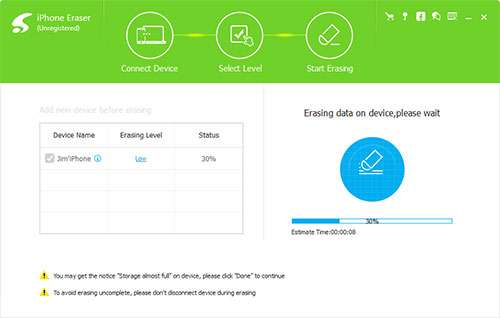
With Tipard iPhone Transfer Ultimate, you can delete videos from you iPad easily. With Tipard iPhone Eraser, you can satisfy all your deleted demands, and delete them for good.


