How to Convert iMovie to MP4 Without Compromising Quality [Easy]
Is your iMovie acting up, and you can not export the iMovie project as MP4? To our surprise, this issue has been happening for quite a while now. Indeed, it is a head-scratcher. To find out why this problem continues, we are here to share it with you and even offer a solution to fix it by converting iMovie to MP4.

Part 1: Why iMovie Can Not Export My Project As MP4?
Projects finished in iMovie are saved in MOV formats by default, which might not support all devices and operating systems. However, you can simply convert your iMovie projects to MP4 files for better integration. While sharing your video, instead of choosing Export Video, select the Share Video option, as this option will make it possible to save the video straight to the Photos or Files app. In case of problems, try restarting iMovie or starting another library.
Part 2: Easily Convert iMovie Files to MP4 on Windows/Mac
Before we proceed to the tutorial on saving iMovie as MP4, let us introduce the best converter on the planet: Tipard Video Converter Ultimate. It is a formidable choice for converting multimedia files easily on Windows and Mac, especially formats limited to Apple environments like MOV. Its versatility is at the top, and it also supports a diversified range of formats, ensuring compatibility with various devices and platforms. If you need help with your iMovie project since it is not set as MP4, follow our tutorial.
Step 1Click the button below to download the latest version of Tipard Video Converter Ultimate. Install the program on your PC and launch it to start using the converter.
Step 2Here, drag the iMovie project you exported and want to convert to MP4 and drop it on the interface to import it.
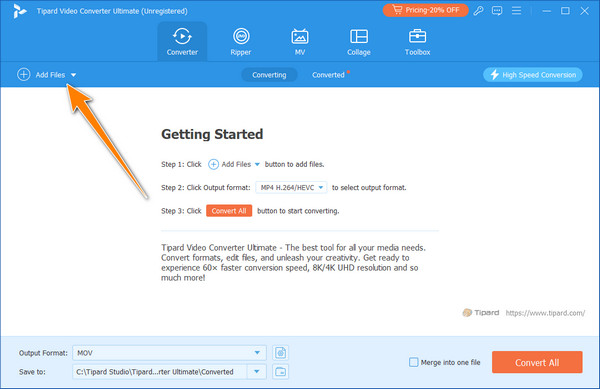
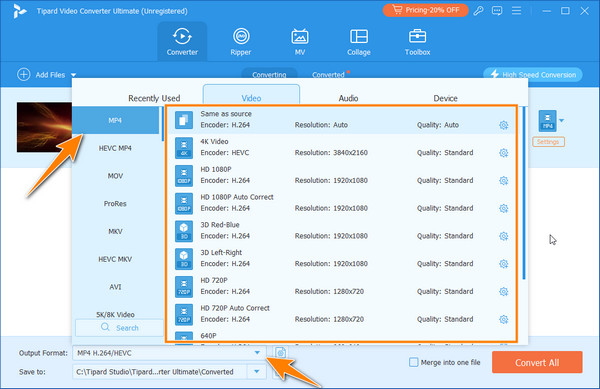
Step 3Go to the lower part of the interface to see the Output Settings. Here, you can access all of the available output formats you can set before you start the conversion.
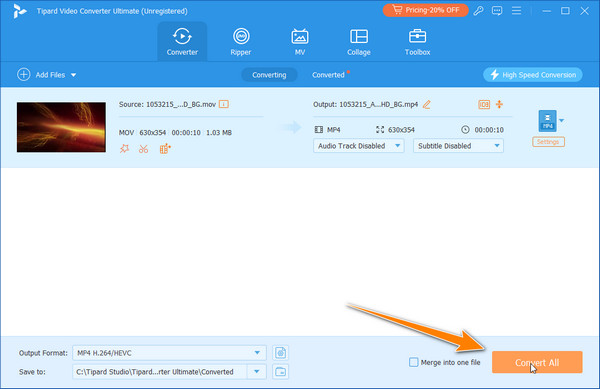
Step 4After selecting the format, click the Convert All button to begin the process. Wait a couple of seconds until the process is complete. When it is, you can access the file in a new folder where it is saved.
Part 3: How to Save iMovie as MP4 on Mac
This tutorial will help you understand how to export MP4 from iMovie. This means that the video files will be compatible with more machines, which makes sharing them via email or simply showing them simpler. Now, let us discuss ways of saving MP4 easily from your iMovie projects.
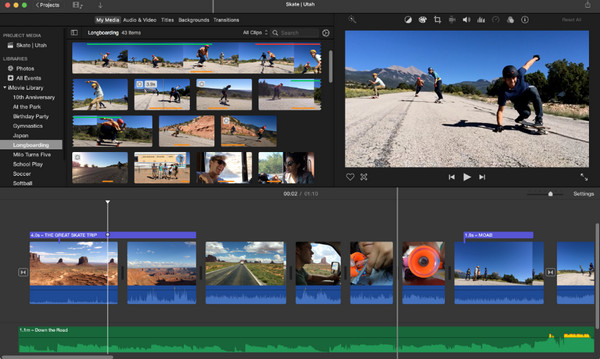
Step 1The iMovie application on your Mac should be opened. To add a video to iMovie, click on the Import Media button. Browse for the folder containing your movie file, select it and hit the Import Selected button.
Step 2Once you have completed the video, click the share button at the top right of the iMovie interface.
Step 3Click Export File in the drop-down menu. This will open an export window, where you can choose the MP4 format and customize specific settings if necessary.
Step 4Tick on the export button to commence the modification process. The exported mp4 will be stored in the specified location.
Part 4: How to Alter iMovie to MP4 on iPhone/iPad
How to export iMovie to MP4? This guide will show you how to export the project you created on iMovie using your iPhone or iPad. So keep an eye on this tutorial; we will simplify it for you to follow as an iOS user. You can also edit videos on iPhone with iMovie.

Step 1Go to the iMovie app and pick the project you want to export as MP4.
Step 2You must tap the Share button to access the Save Video.
Step 3Inside it, you can access different settings. Tap HD and select MP4 as a format. Adjust the export settings and tap Save Video. If the video remains as MOV, you can use an MOV to MP4 converting method to solve the problem.
Part 5: How to Export iMovie to MP4 Using the Terminal
In this section, we will explore more options for changing iMovie to MP4 format using Terminal. This text-based interface has a converting feature, and if you want to learn how it works, you can follow the tutorial we have prepared here.
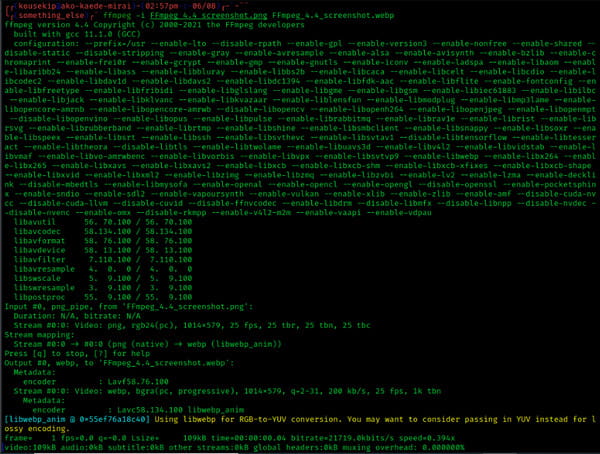
Step 1Download the FFmpeg on your Mac, or install it by typing brew install ffmpeg.
Step 2Open the Terminal on your Mac and navigate to your iMovie file's directory.
Step 3Type this command and press Enter, ffmpeg -i input.mov output.mp4, but remember to change the input to the file's name and the output to your desired file name. After that, the file will be ready to used as MP4.
Tip: If this method is too hard for you to follow, try changing the extension name of the project.mp4 instead of .mov. Though this method could be better, some users say that it works on their end. So, if you want to try it, create a copy in case the result is corrupted.
Further Reading:
How to Convert and Import MP4 to iMovie with Ease
Learn How to Compress A Video in iMovie [Easy Methods]
Conclusion
Amazing, right? The methods we have added in this article make converting the iMovie file to MP4 doable. So, if you are interested in changing the iMovie format set to it, which is MOV, to MP4, then there is no need to be troubled. Thus, some versions of the iMovie on iOS do not offer the mentioned feature and will keep saving your project when exported to Photos as MOV. In that case, you will need to use our most reliable video converter, the Tipard Video Converter. Transfer the MOV file to the PC and let the converter handle this situation.


